Tags help you organize and classify your content more flexibly than categories. While categories offer a broad structure, tags provide specific labels that make content easier to filter, search, and relate.
To create a new tag in The Smart DMS:
- Go to the Tags section from the Content Management Panel.
- Click “Create Tag”.
You’ll see a form titled Manage Tag Details with the following fields:
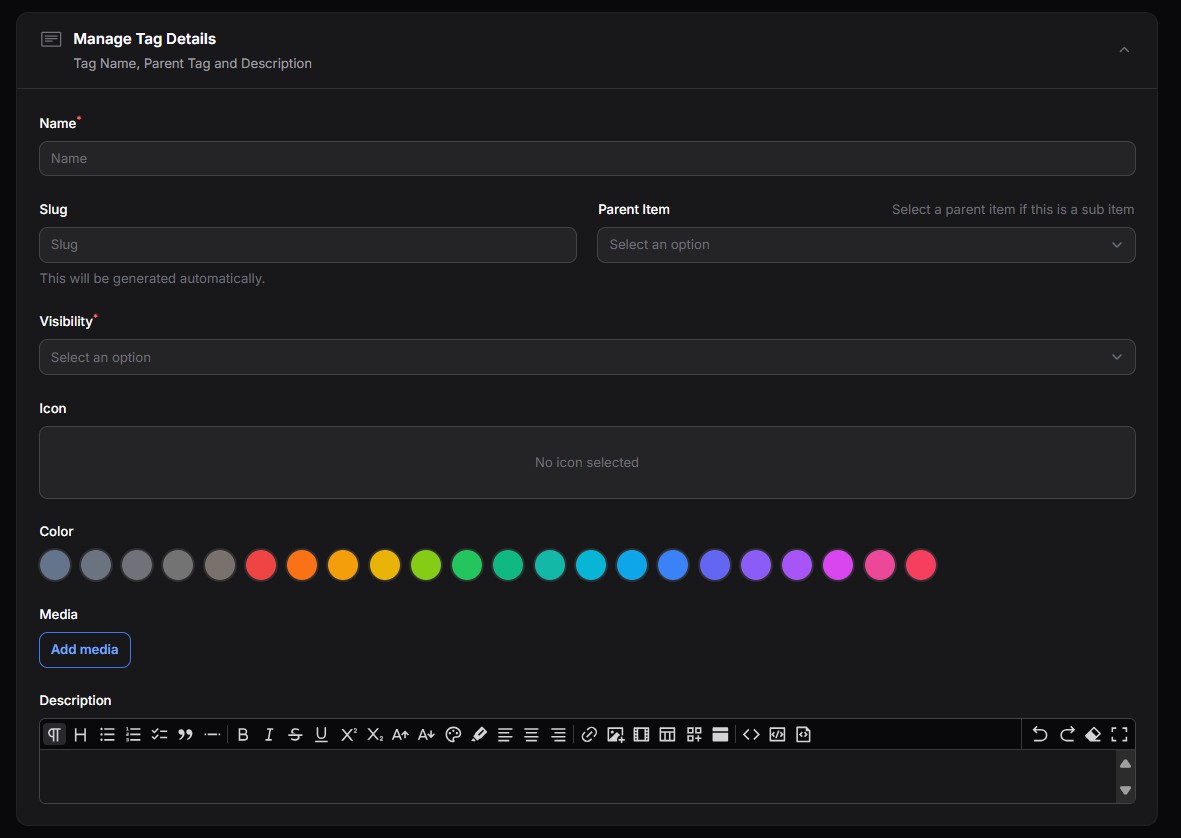
- Name
Give your tag a unique, descriptive name (e.g., Installation, Health, Policy). - Slug
This is auto-generated from the name. It’s used in URLs or references. - Parent Item (Optional)
Select a parent tag if this is a sub-tag under another. For example, Training → Safety. - Visibility
Set who can see this tag (e.g., internal use only, public, admin-only). - Icon
Optionally choose an icon to visually represent the tag. - Color
Select a color to help visually identify or group related tags. - Media
You can associate an image or file with the tag (e.g., a tag banner or symbol). - Description
Add a rich-text description for internal understanding or tooltip help.
Best Practices #
- Keep tag names short and clear.
- Don’t overuse tags—stick to meaningful labels.
- Combine tags with categories for better organization.


